These are the steps that you need to take when installing a facial plate. These steps include selecting the right dimensions, screw diameter, and material. Once you have all of these factors down, it's time to install your face plate. Continue reading to find out how to install your facial plate. It's simple to install, and will ensure your lathe functions as intended. The steps involved in installing a faceplate are listed below.
Dimensions
Faceplates are a primitive accessory that can hold almost any shape and with great accuracy. In addition to wood, face plates can be made from light alloys or temporary materials. These faceplates may be used temporarily or for more difficult workholding tasks. In the case of a wooden faceplate, the workpiece can be attached to the wooden faceplate using wood screws to trepanne the holes. This arrangement is common in industrial lathes, but not in home workshops.
It is crucial to know the dimensions of your faceplate. The dimensions of your faceplate should match the size of the blank. If you're planning on using it for different purposes, make sure the screws will not interfere with one another. The faceplate should have a hole to hold a wrench. You should find slots for a screwdriver and holes to hold a wrench. The faceplate is accessible for each tool.
Material
A faceplate for a turning lathe can be made out of many materials such as aluminum or cast iron, steel, and even welded structures. Various materials and their properties should be considered when designing a face plate. Here are some factors to consider when choosing a material for your faceplate. For accuracy and durability, it is important that the design process considers specific material properties. Cost optimization is also dependent on the materials used for a faceplate.
A faceplate for lathes is typically made of polymeric materials and has a circular surface. The faceplate is typically made from a polymeric material and has indicia lines, a plane front, and recesses that allow for the chucking of the workpiece. Some faceplates are equipped with fasteners in inserts made of a different color. This serves as an alert to the user in the unlikely event that a fastener falls out.
Screw size

You might want to use a different size screw if you are using a wood lathe. This is because the screw size determines how much space is available for the threads. If your screw diameter is larger, it will protrude past the faceplate and cause damage to its wood bowl. A slightly concave or convex faceplate might be appropriate depending on the dimensions of your lathe.
There are many options for faceplates, including steel or alloy. The smaller versions of faceplates are made from alloy while the larger ones of steel. The alloy faces can become damaged over time. To prevent blanks from becoming loose and prevent them from being turned, it is important that experienced turners know how mount them. On the other hand, beginners may be too cautious with their tools or attempt to turn a blank too big for their tools.
Installation
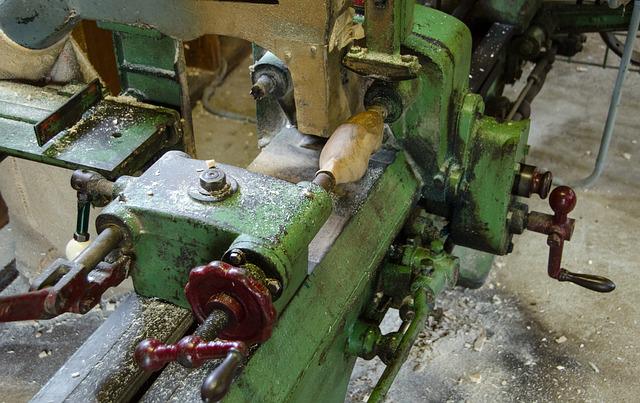
Before you mount the faceplate onto your lathe's head, make sure to disconnect the power source. Next, mount the faceplate onto your workpiece. To turn the faceplate, turn the spindle clockwise as far as it will go. Once the faceplate in position, engage its spindle lock. Then turn the faceplate clockwise until the spindle turns freely. You can remove the faceplate by disengaging the spindle lock and turning the lathe counterclockwise to stop it.
A faceplate, a flat, circular, threaded, plate placed on the front of a turning lathe, is called a faceplate. The slotted surface can accept clamps and any other fastening device. Once positioned on the faceplate, the workpiece is secured by sliding the clamps through the slots or screwing them directly into the faceplate's threads. Once the workpiece is in place, the faceplate can be screwed onto the lathe spindle.
FAQ
Are you a genius in order to master woodworking?
No. Woodworking does not require any special skills. Anyone can learn how to use basic power tools and techniques to create beautiful works of art.
Where to Buy Hardwood Lumber?
Home Depot can sell hardwood lumber. You can find all types of wood products at Home Depot, such as flooring, cabinets and furniture.
A wide range of engineered hardwoods are also available, such as Ipe and Brazilian Cherry (Pau d'Arco), Mahogany and Swietenia Macrophylla.
You can search Google for hardwood lumber to find them online.
How often should I purchase new supplies?
You may have to replace certain tools. Hand tools will need to be sharpened regularly. If you are using power tools, you will need to purchase replacement parts regularly. Avoid buying too many products at once. Spread your purchases out over several months.
How can a novice woodworker make it big?
Many people want to open an online furniture business and are learning how to build it. However, if you're just getting into furniture building, there are other options than selling on Etsy. You could sell at craft fairs or local events. A workshop could also be offered for people who are interested to learn how they can build their own furniture. If you have the experience to be a carpenter, builder, or a designer, you may consider offering your services in remodeling homes or creating custom pieces.
Where can I start woodworking?
You can learn the most effective way to build furniture by actually building it. You'll need tools, and you'll have to make mistakes along the way, but if you keep at it, you'll eventually figure out what you're doing.
You should first choose the project you wish to complete. It could be something as simple as a box or as elaborate as a full-scale entertainment center. Once you have chosen a project, locate a local woodworker who is skilled in this kind of work. Ask your local woodworker to help you determine the right tools for you and where they are located. You might even ask whether there's someone else you can talk to who does this kind of work.
What's the difference between plywood vs particle board?
Plywood is made of layers of wood that are pressed together under pressure. Plywood comes in several thicknesses and is commonly used for cabinets and flooring. Particle board is made up of sawdust mixed in resin, then compressed into large pieces. This board is commonly used in home improvement projects. Both types are sturdy and easy to cut.
You can learn how to woodwork.
It is best to do it yourself. Woodworking is an intricate art form that requires practice, skill, patience, and experience. To master any craft, it takes time.
It is the best way to learn to do something is to actually do it. Start small, and work your way up from there.
Statistics
- Woodworkers on the lower end of that spectrum, the bottom 10% to be exact, make roughly $24,000 a year, while the top 10% makes $108,000. (zippia.com)
- Most woodworkers agree that lumber moisture needs to be under 10% for building furniture. (woodandshop.com)
- The best-paid 10 percent make $76,000, while the lowest-paid 10 percent make $34,000. (zippia.com)
- The U.S. Bureau of Labor Statistics (BLS) estimates that the number of jobs for woodworkers will decline by 4% between 2019 and 2029. (indeed.com)
External Links
How To
How to join hardwood without using nails
Woodworking is a hobby that many people enjoy doing. It's fun and relaxing because you can use your hands to make something useful from wood. You may need to join two pieces without the use of nails. This article will help you to maintain the beauty of your woodwork projects.
Before joining the pieces of wood together, you will need to first trim any edges. You don't want to leave sharp corners that could cause problems later on down the road. Now you can start gluing the boards together.
If you are working on hardwood, you should only use glue on one side. If you are using softwoods such pine or cedar, glue should only be applied to one side. Once the glue has dried, press the boards together until they are fully adhered. Before you proceed to the next step, be sure to let the glue dry completely.
After you have glued the boards together, drill holes in the joints where you intend to place screws. You can choose the type of screw to determine the size of your holes. If you plan to use a 1/2 inch wood screw, drill a hole at least 3/4 inches in depth.
Once you've drilled your holes, you'll want to drive the screws through the joint and into the backside of the board. Don't hit the board's surface. You could damage the finish. Avoid hitting the screws' ends too often when driving screws. This will prevent the wood from splitting.
Protect your finished project now. To do this, you can seal the entire furniture piece or just cover the top. You want it to last years, so you can use any product. Examples include oil-based varnishes and polyurethanes, shellac, lacquer and others.
These products can generally be found in any home improvement shop. Just make sure that you buy the right kind for the job. Also, remember that some finishes are toxic and should never be used indoors. Wear protective gear whenever you are handling them.