A photo trail is a great way to start carving your own eyes if you've ever wanted to. This can help you to imitate a famous carving without having to spend hours researching the styles. You want your eyes and hands to look as natural as possible. It will also be very enjoyable. However, if you've never been a talented carver, don't worry. There are many easy ways to achieve realistic-looking eyes!
Lesson 4 Carving hair
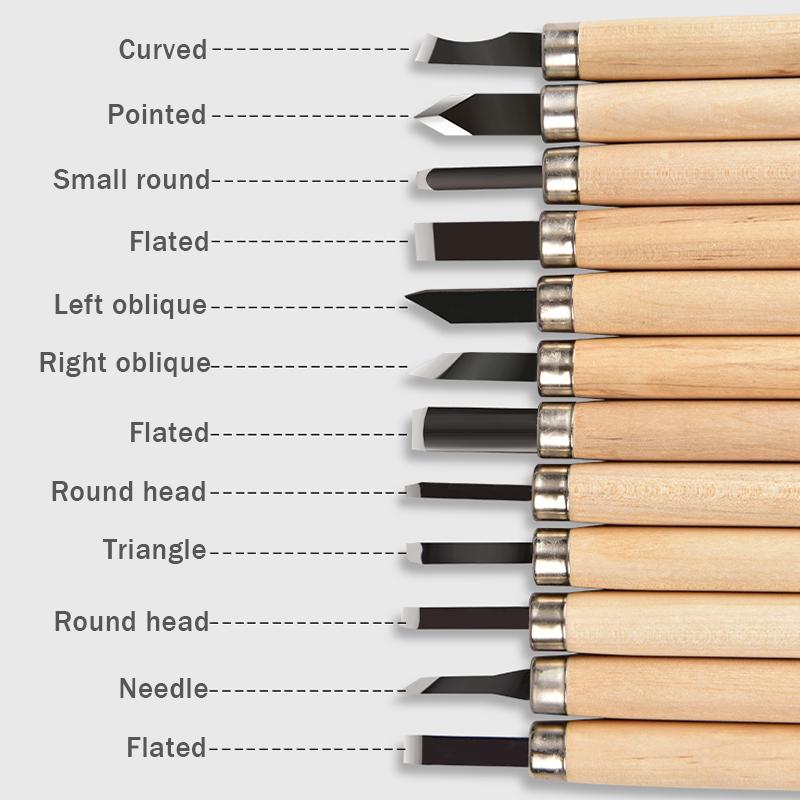
This tutorial will guide you through the steps of carving a flowing hairstyle on your animal carving. It will give you the ability to create an authentic appearance and create the illusion that your animal is experiencing a real emotion. You will be able to see the various tools that you can use for creating different textures. You can also learn how to use different curved tools to create the different levels of cut hair. Once you've mastered the basics of hair cutting, you can move on to more difficult parts like the eyeballs or nose.
Begin by drawing a line around the eye sockets with a pencil. Next, draw a straight line extending from the eyelids and eyebrows. You can also draw small squiggles on the forehead to make it rounder. You can then use a whittling razor to smoothen the corners of the cheeks.
Lesson 5: Carving crow's feet
Crow's feet can be a sign of crows feet. Learn what causes them. Repeated facial expressions like squinting can cause wrinkles. If you have crow's foot, you can use reading glasses, or get sunglasses. You can also use facial moisturizers to prevent the formation of crow's feet.
Face wrinkles and fine lines can make people look older than they actually are. It is possible to remove wrinkles and fine lines from the face, giving you a younger appearance. Here are some useful tips:
Lesson 6: Carving an iris
For this lesson, children can look at the iris and ocellus in a mirror to see how they appear and feel. They can also draw their eye using observational drawings and the mirror. They can also look for white and different shades in the central black. After they've finished drawing, they can add color using different media to create depth illusions. Children can then compare the colours in their eyes by looking at one another's drawings.
FAQ
Can you teach yourself woodworking?
The best way to learn anything is by doing. Woodworking is an art that takes patience, practice, skill and experience. Any craft requires patience to master.
You can learn the most effective way to master a skill is by actually doing it. Start small and learn from your mistakes.
Where can I buy woodworking supplies?
You can find everything you need in many places. You could go to your local hardware shop or visit websites such as Amazon.com.
You can also look for used furniture at flea markets or garage sales.
Do you know anything more about woodworking?
Furniture making is a laborious task. It's easy not to appreciate how hard it is. Finding the right type of wood is the most difficult aspect of this process. There are so many wood options that it can be difficult to choose the right one.
Another issue is that wood does not have the same properties. Woods can warp, split, or crack over time. These are important considerations to make before you purchase wood.
Where can I find free woodworking plans?
To find free woodworking plans, you don't have to buy any magazines or books. Search Google for free woodworking plans. Just enter "free woodworking" into the search bar, and you'll see hundreds of websites where you can download free plans.
How long does a piece take to finish?
It depends on the type of wood you choose, the complexity of the design, and the amount of finishing you apply. Hardwoods, on the other hand, are more durable than softwoods. Hardwoods tend to be more expensive that softwoods. But they last longer and resist moisture better. The process of finishing a piece of furniture typically takes anywhere from one week to three months.
What's the difference between plywood vs particle board?
Plywood is a combination of layers of wood, which are then pressed together under high pressure. Plywood is available in a variety of thicknesses. It is often used to make cabinets or flooring. Particle board is made from sawdust mixed with resin and then compressed into large blocks. This board is commonly used in home improvement projects. Both types of boards are durable and easy to cut.
Do you have any tips on starting a woodworking business?
It can be difficult to start a woodworking shop. But if you're passionate about your hobby, you won't mind putting in the effort. Plus, you'll probably enjoy the challenge of running your own business.
Remember that you may encounter unexpected problems when starting a new venture. You may run out of money suddenly. You might find customers not willing to pay the amount you expected. You must be ready to deal with such situations in order to survive.
One good tip is to set up a separate bank account specifically for your business. This will ensure that you always know how much money has come in.
Statistics
- Overall employment of woodworkers is projected to grow 8 percent from 2020 to 2030, about as fast as the average for all occupations. (bls.gov)
- Woodworkers on the lower end of that spectrum, the bottom 10% to be exact, make roughly $24,000 a year, while the top 10% makes $108,000. (zippia.com)
- Most woodworkers agree that lumber moisture needs to be under 10% for building furniture. (woodandshop.com)
- If your lumber isn't as dry as you would like when you purchase it (over 22% in Glen Huey's opinion…probably over 10-15% in my opinion), then it's a good idea to let it acclimate to your workshop for a couple of weeks. (woodandshop.com)
External Links
How To
How to make wood joint
This tutorial will show how to join 2 pieces of wood together. We will use the "pockethole joint," which means that we drill holes in the wooden pieces and then glue them together. This works well if the wood is straight and smooth. If your wood isn't straight or flat, you might want to try another method, such as dowel joinery. Here are the steps
-
Drill Pocket Hole Joints. To start, measure and mark where you want to put the pocket hole joint. You will then drill 3/4" deep holes through each piece of wood with a jigsaw, handheld drilling machine, or hand-held drill.
-
Sand Smooth. The wood's edges can be sanded to prevent splitting.
-
Glue Together Apply glue to both sides of the wood. Allow it to cool for at least 5 minutes before you attach the pieces.
-
Secure the pieces together. After the glue has dried thoroughly, secure the pieces so that they are flush.
-
Trim Joinery. After the glue dries completely, trim off any excess wood around the joint.
Be sure to leave enough space between each piece so that they can be turned inside-out.