
When you start learning how to work with wood, you will have to practice patience and perseverance. Woodworking is a rewarding hobby and one that can be enjoyed with less precision. This article will discuss the following topics: Starting, Hand tools, Joining and Finishing. By the end of this article, you should be well on your way to creating your first project. Before you begin, you need to be familiar with the following skills.
Basic woodworking skills
DIYers will enjoy woodworking as a hobby. You can find thousands of plans for woodworking on the internet. These plans include cut lists, measurements, materials, tools, and instructions. You should build what you enjoy when you start woodworking. Don't worry about the most difficult or expensive projects. You will become more confident and be able to tackle larger projects. Basic woodworking skills are crucial to becoming a more proficient craftsperson.
Hand tools
A good tool kit includes essential tools to help you with basic woodworking projects. The square is essential for quality projects. It has a measuring surface. Every woodworker should have a measuring tape in their belt. It can measure length, distance, and size. It can also be used as a hand tool for beginners in woodworking. Here are some of your essential woodworking tools.
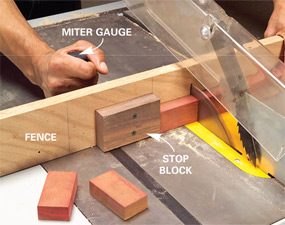
Joining wood
There are many ways to join wood. Hand-cut joinery, which is traditionally used to build furniture and other wood projects, is very popular. Though fancy joints are beautiful, most projects will require simple, strong joinery. Four of the best methods are pocket screws, dowels, biscuits, and the Beadlock system. Try one or all of these techniques to see which works best for your projects.
Finishing
Finishing is an essential part in woodworking. This gives wood its desired characteristics. Additionally, finishing can affect other wood properties such a tone in musical instruments or hardness of flooring. Some woods are low in value, but these skills will help you make them look expensive. Several different techniques are available to finish wood, and learning them will allow you to add value to your work.

Safety
Safety and health is essential for all woodworkers. Woodworking is a complex industry with many hazards. Employers have a legal obligation to provide training for their staff on woodworking safety and ensure their employees are fit for work. Assessing woodworking hazards can be difficult. These are some ways to make your workplace safer.
FAQ
Do I have the potential to make a decent living doing this?
Yes! In fact, many woodworkers already do. According to the U.S. Bureau of Labor Statistics in May 2012, the median annual income for woodworkers was $34,000 This is higher than the $31,000 annual national average.
Are there any tips for starting a woodworking enterprise?
It is hard work to start a woodworking company. However, if you are passionate about your hobby you will be willing to put in the effort. Plus, you'll probably enjoy the challenge of running your own business.
It is important to remember that unexpected problems may arise when you start a new venture. You might run out money, or you may have to borrow unexpectedly. Or maybe you'll find that customers aren't willing to pay as much as you'd hoped. You need to be ready for these situations if you want to survive.
A good tip is to open a separate bank account for your business. This will ensure that you always know how much money has come in.
What tools should I start with when becoming a woodworker?
Woodworking is an art that takes patience and practice. It takes time to master all the tools and techniques involved in woodworking.
There are many woodworking tools on the current market. Some people prefer using power tools while others prefer hand tools.
It's your choice. But you should ensure that you pick the right tool. It may be a good idea to start with a basic set, if possible, if you don’t know much about hand tools.
You could also try learning how to use a router which is used to cut intricate shapes into wood. You can find these at most hardware stores.
How long does it take you to finish a piece?
It depends on the size of the piece of furniture. A smaller project like picture frames or boxes can be completed in a single day. Larger projects such as tables and desks can take several days to complete. It takes time in order to properly stain or seal the wood.
How often should I get new supplies?
Some tools will need to be replaced over time. Hand tools will need to be sharpened regularly. If you are using power tools, you will need to purchase replacement parts regularly. To avoid buying too much at once, try to spread your purchases out over a few months.
Statistics
- Overall employment of woodworkers is projected to grow 8 percent from 2020 to 2030, about as fast as the average for all occupations. (bls.gov)
- If your lumber isn't as dry as you would like when you purchase it (over 22% in Glen Huey's opinion…probably over 10-15% in my opinion), then it's a good idea to let it acclimate to your workshop for a couple of weeks. (woodandshop.com)
- The U.S. Bureau of Labor Statistics (BLS) estimates that the number of jobs for woodworkers will decline by 4% between 2019 and 2029. (indeed.com)
- In 2014, there were just over 237,000 jobs for all woodworkers, with other wood product manufacturing employing 23 percent; wood kitchen cabinets and countertop manufacturing employing 21 percent. (theartcareerproject.com)
External Links
How To
How to stain wood
Staining wood refers to applying chemicals to wood's surface. This chemical reaction causes the wood to change in color. This chemical reaction causes the wood color to change from white and brownish red. Oak is the most common wood type for staining. However, you can also use other wood types.
There are many methods to apply stain to wood surfaces. Mixing the stain in a solvent such as turpentine and spraying it onto the wood is one method. Another method involves applying a solution of water to the wood. You can mix stains into varnishes or paints to make them part of your finish coat.
Preparing the surface for staining wood is the first step. You must clean the wood well to remove any grease or dirt that might interfere with the application of the stain. Sanding the wood smooths out rough spots and scratches. The next step is to determine the type of stain you would like to use. There are two basic kinds of stains: penetrating stains and non-penetrating stains. Penetrating stains penetrate deeper into the wood than non-penetrating ones, making them ideal for dark colors such as mahogany. Non-penetrating stains work best with light colors like maple.
You will need to decide on the type of stain you want to use, and then prepare your tools. A paintbrush works well for applying stains because it allows you to spread the liquid evenly across the surface. It is a good idea to have rags on hand in case you need them to clean up any stains that may remain after you have finished painting. You should have enough containers to store the various components of the stain mixture if you intend to mix it yourself.
Once you have prepared all your materials, it is time to clean the areas where you will stain the wood. Clean the area with soap and warm water to get rid of dirt and grime. Wipe the entire piece of furniture with a rag dampened with clean water. You should remove any debris, especially if your plan is to stain darker wood.
Next, spray the stain. Begin at one end and spray or brush the stain on the wood. Move slowly and carefully along the grain of your wood until you reach its opposite end. Make sure that the stain does not drip off the edge of the wood. Before proceeding to the next step, let the stain dry thoroughly.
A coat of clear polyurethane sealing agent is applied to protect the paint. Three coats of polyurethane sealing agent are required. Allow the third coat to dry overnight before sanding the final coat.