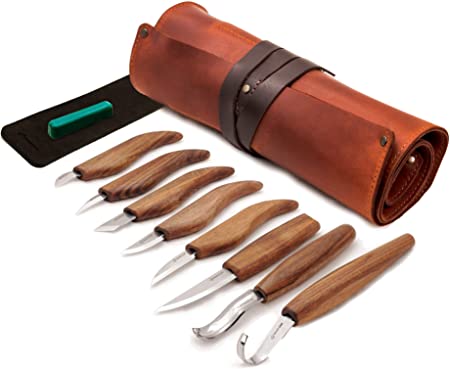
You can try your hand at woodcarving by choosing from several patterns. These patterns can also be printed which simplifies the whole process. Beginning students can begin with geometric patterns. After they have mastered the art of carving, they can move onto other patterns like animals and flowers. This article will provide a variety of examples of woodcarving designs. Here are some great patterns to help you master the art.
Fine Woodworking by Dremel: Detail Engraved Flower
If you're into crafting projects, you might want to try the Detailed Engraved Flower by Finewoodworking by Dremel. These rotary tools (often called Dremels) are great tools for engraving and detail. They are simple to operate. You just need to set the speed dial and push a button on the head of your unit. The speed dial will control how much material the tool can take out when carving a wood surface.
Detailed Engraved Flower by Frank C. Russell
The "Detailed Engraved Flower By Frank C. Russell" has been reproduced both nationally and internationally. Russell's early work, although not entirely documented, was largely based on first-hand observation. His later works, which combine secondhand information with fictionalization, are not strictly documentary. These documents are not a definitive record of the narrator's life.

His earliest work, "Detailed Engraved Flower" by Frank C. Russell, is a great example of his skill. This small piece is made from an ivory grip with a bull’s head. It dates back to 1911. It measures only a few millimeters in length. The artist created this masterpiece as a tribute to his mother, who had died before him.
Tumbled Rose Detail Engraved Flowers
Detailed Engraved Flower by Tumbling Rose is a beautiful wood carving pattern. This flower is simple in appearance, but it's actually made up of many intricate petals. The intricate details make it a wonderful project for the novice carver. Although the photos show only a few parts of the engraved rose, you might be able find some pieces that work better than others. Tumbled Rose's detailed engraving flowers come in many sizes.
FAQ
What's the time taken to finish a piece furniture?
It all depends on how large the furniture is. Boxes and picture frames are small projects that can be completed in one day. Larger projects, like desks or dining tables require several days. It takes time in order to properly stain or seal the wood.
Does it take a genius to make woodworking work?
No. No. Woodworking isn't rocket science. Anyone can learn how to use basic power tools and techniques to create beautiful works of art.
Where can I start woodworking?
Building furniture is the best way to learn how furniture is made. You'll need tools, and you'll have to make mistakes along the way, but if you keep at it, you'll eventually figure out what you're doing.
Begin by choosing the project that you want to finish. You can make a simple box or a large entertainment center. Once you've decided on a project, find a local woodworker who specializes in that kind of work. Ask him or her for advice on what tools you'll need and where to find them. You might even ask whether there's someone else you can talk to who does this kind of work.
How do you know which tools are the best for you?
It's important to consider your preferences and needs when buying tools. Do you prefer metal or plastic handles What size screws or nails do you prefer? Would you rather use hand tools than power tools?
Where can I buy woodworking supplies?
You can find everything you need in many places. For example, you could visit local hardware stores or look online at websites like Amazon.com.
You can also look for used furniture at flea markets or garage sales.
Where can I find free woodworking plans?
Free woodworking plans are available online. You don't even need to buy books or magazines. You just need to search Google. Enter "free woodworking", and you will see hundreds upon hundreds of websites offering free plans.
How can a woodworker start making money?
Many people learn how to make furniture in order to set up an online business. You don't have to sell on Etsy if your furniture is just beginning. You can sell at local craft fairs. For those who want to build their own furniture, you might offer workshops. If you have the experience to be a carpenter, builder, or a designer, you may consider offering your services in remodeling homes or creating custom pieces.
Statistics
- Woodworkers on the lower end of that spectrum, the bottom 10% to be exact, make roughly $24,000 a year, while the top 10% makes $108,000. (zippia.com)
- In 2014, there were just over 237,000 jobs for all woodworkers, with other wood product manufacturing employing 23 percent; wood kitchen cabinets and countertop manufacturing employing 21 percent. (theartcareerproject.com)
- Most woodworkers agree that lumber moisture needs to be under 10% for building furniture. (woodandshop.com)
- Overall employment of woodworkers is projected to grow 8 percent from 2020 to 2030, about as fast as the average for all occupations. (bls.gov)
External Links
How To
How to stain hardwood
Staining wood is the process of applying chemicals to the wood's exterior, which alters its color. This chemical reaction causes wood to turn from whiteish to brownish. Oak is the most common wood type for staining. However, you can also use other wood types.
There are many methods to apply stain to wood surfaces. Some methods involve mixing the stain with a solvent (such as turpentine) and then brushing or spraying the mixture onto the wood. You can also apply a solution containing water and dye directly to the wooden surface. It is possible to mix stain into varnishes and paints, making it part of the finishing coat.
Preparing your wood for staining is the first thing to do. Clean the wood to get rid of any grease, dirt or other substances that might be detrimental to the stain's application. Sanding the wood smooths out rough spots and scratches. The next step is to choose the stain type you want. There are two types of stains that can be used: penetrating and non-penetrating. Penetrating stain penetrates deeper into wood than nonpenetrating, making them suitable for dark colors like mahogany. Non-penetrating stains work best with light colors like maple.
After deciding on the type of stain, you want to apply, prepare your tools. The best tool for applying stains is a paintbrush. It allows you to evenly distribute the liquid over the surface. It is a good idea to have rags on hand in case you need them to clean up any stains that may remain after you have finished painting. If you plan to mix the stain yourself, make sure you have enough containers available to hold the different components of the mixture.
Once you have prepared your materials, start by cleaning the area where you plan to stain the wood. You can remove grime and dirt with warm water and soap. You can wipe down the entire furniture using a damp rag with clean water. If you intend to stain darker wood, make sure you get rid of any debris.
Apply the stain. Next, apply the stain to the furniture by starting at one end. Work slowly and carefully, moving back and forth along the grain of the wood until you reach the opposite end. Keep the stain from dripping off the wood's surface. Let the stain dry completely before proceeding with the next steps.
Apply a clear polyurethane sealant to protect the painted surface. Three coats of polyurethane sealing agent are required. Let the third coat dry overnight before you sand the final coat.