You can use the woodturning ring tool to make undercuts on the spindle. You must always be in front of the spindle when using this tool. Slowly move away from it. It is important not to pull the cutting tips too fast. This could result in the breaking of the ring. The inner side is sandable before the spindle seperates. It is also recommended to use the captive ring tool to make undercuts on the spindle before separating it from the spindle.
Termite tool
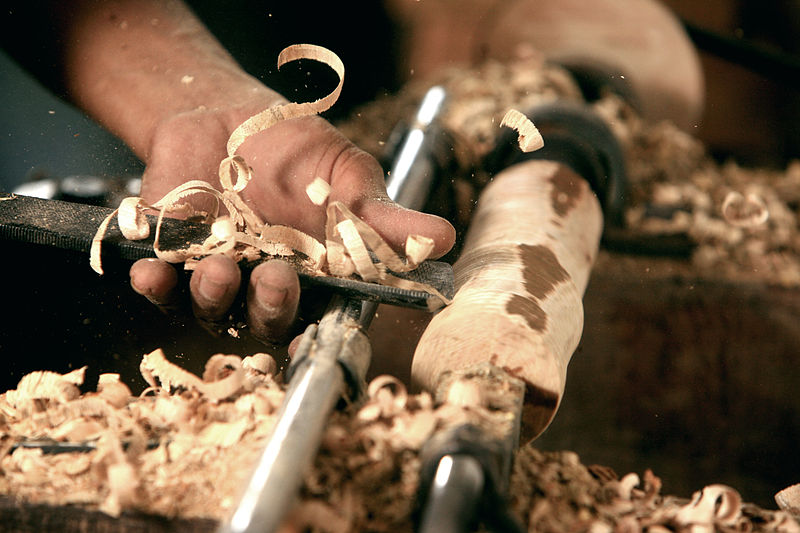
The Termite Tool for Woodturning is a ring-shaped cutter that hollows end grains quickly. It's named Termite for its ability to cut very smoothly and require little sanding. The Termite tool is particularly useful for hollowing goblets or hollow vessels, including boxes and boxes. You can also use this tool to make bowls and vessels.
The Termite tool has a ring-shaped edge that cuts through almost any material. Termites are ideal for hollowing small containers without drilling a hole. Unlike a drill, the termite picks up the cut right off the center. It can produce flat or concave bottoms. The Termite tool can only be used if the cutting edge is first presented to the wood. Otherwise, the wood drive will catch onto the termite tool.
Hercules
The Hercules woodturning ring-tool is a versatile, heavy-duty tool that can help you turn intricate bowls or pen forms. Its 3/8” round #3 Hunter Carbide Cutter with 5/8” square shank is perfect for rough- and finish turning. The lathe's tool support and ways absorb impact from the wooden turning tool. However, the lathe provides a smooth touch that makes final finishing cuts much easier.

Hercules also provides a complete woodturning-ring-tool set, which includes a power drilling rig, a rotary drill, and a standard charge. This tool set is $130 in-store and $25 online. This bundle price is also great if shopping outside of peak holiday season. Hercules products are better than other brands, so you will save money long term.
Osprey
Osprey's woodturning tool ring-tool gives you a nice finish on your bowls. This tool is made of #2 Hunter Carbide butter and fabricated with a 1/2"-round shank. This tool is great for fine finishing cuts but can also be used for basic turning tasks. This will be a great gouge for those looking for a brand new one.
Osprey woodturning rings-tools come with a drill. This versatile piece is easy to use with a drill-press or simple corded. The drill-bit is important for making a precise hole, but a beginner can get by with a Forstner bit. A larger blank can be purchased to drill the first few rings if you are a beginner.
Robert Larson
There are many choices when it comes down to choosing a woodturning band tool. Some people prefer to get a hand-made tool, while others prefer a digital model. The Robert Larson Co Gouge Slip is a great tool for beginners. It is affordable and includes hardened brass plates as well as pins. The set comes with two pins for marking joints and one pin for standard marking. These are two excellent choices.
Benjamin's Best
You've likely seen ads for Benjamin's Best's woodturning ring tool. What is the real difference in these tools from the rest? They aren't the same. Each piece of the Benjamin's Best woodturning tool includes eight pieces. The ring can be used for smooth and even turning surfaces. It comes with a black coating for durability.

The ring tool includes a captive ring, which is unlike other woodturning instruments. These rings can be functional or decorative, depending on how they are designed. These rings could even be used to make puzzle pieces for nonturners! Many spindle turns use captive rings. The ring tool makes it easy to make all these pieces.
CROWN
CROWN woodturning tools are versatile tools that can hollow thin-walled wetwood objects. The dual bevel "High Speed Steel", high-strength steel ring gives it a great finish when hollowing into an end grain. It is capable of handling both flat and curved forms with ease. It is an excellent value for money. The handle is stained beech and can be used for many tasks.
Made in Sheffield, England, the CROWN woodturning ring tool is made of the highest quality, cryogenic steel. The double bevel design allows you to cut on both the left or right sides of the ring. The tool's sharp edge can withstand years of professional work thanks to its meticulously polished and ground interior. This tool also comes with a lifetime warranty. Crown's tools can be used for woodturning and are made to last.
FAQ
How often should I get new supplies?
You'll probably have to replace some of your tools over time. If you're using hand tools, you'll need to sharpen them regularly. If you are using power tools, you will need to purchase replacement parts regularly. Spread your purchases over several months to avoid purchasing too many items at once.
Where do I get my woodworking supplies?
There are plenty of places where you can find everything you need to start out. You could go to your local hardware shop or visit websites such as Amazon.com.
You might also consider flea markets and garage sale for any old furniture or other materials you could reuse.
Can you teach yourself woodworking?
Learning by doing is the best way of learning anything. Woodworking is an intricate art form that requires practice, skill, patience, and experience. Mastering any craft takes time.
The best way to learn how to do something is actually to do it. Start small and learn from your mistakes.
What's the difference between plywood vs particle board?
Plywood can be described as a mixture of layers and wood that have been pressed together with pressure. Plywood comes with a range of thicknesses, and it is most commonly used for flooring and cabinets. Particle board is made of sawdust and resin that has been compressed into large blocks. This board is commonly used in home improvement projects. Both types of boards can be easily cut and are durable.
Statistics
- If your lumber isn't as dry as you would like when you purchase it (over 22% in Glen Huey's opinion…probably over 10-15% in my opinion), then it's a good idea to let it acclimate to your workshop for a couple of weeks. (woodandshop.com)
- The best-paid 10 percent make $76,000, while the lowest-paid 10 percent make $34,000. (zippia.com)
- In 2014, there were just over 237,000 jobs for all woodworkers, with other wood product manufacturing employing 23 percent; wood kitchen cabinets and countertop manufacturing employing 21 percent. (theartcareerproject.com)
- Average lumber prices rose about 600 percent between April 2020 and May 2021. (familyhandyman.com)
External Links
How To
How to stain wooden surfaces
The process of staining wood involves the application of chemicals to the wood's surface, which causes it to change its color. This chemical reaction changes the wood's color from white to brownish. Oak is the most commonly used wood for staining, but other woods can also be stained.
There are many ways to stain wood surfaces. You can mix the stain with a solvent, such as turpentine, and spray it onto the wood. Another method involves applying a solution of water to the wood. The stain can be mixed with paints and varnishes to become part of the final coating.
Preparing the surface for staining wood is the first step. Cleaning the wood thoroughly removes any dirt or grease that could interfere with applying the stain. Sanding smoothens scratches and rough spots. Next, you need to decide which stain you want. There are two main kinds of stains available: non-penetrating stains and penetrating. Penetrating stains penetrate deeper into the wood than non-penetrating ones, making them ideal for dark colors such as mahogany. The best non-penetrating colors are those that work with light colors like maple.
Once you have decided on the stain type that you want, get your tools ready. Because you can spread the stain evenly with a paintbrush, it is ideal for applying them. A few rags are also handy to clean up any spillages after you have finished painting. If you plan on mixing the stain yourself make sure that you have enough containers to hold the different components.
Once you have prepared your materials, start by cleaning the area where you plan to stain the wood. Clean the area with soap and warm water to get rid of dirt and grime. You can wipe down the entire furniture using a damp rag with clean water. If you intend to stain darker wood, make sure you get rid of any debris.
Next, apply the stain. Start at one end of the piece of furniture and brush or spray the stain onto the wood. You should work slowly and carefully. Continue moving along the grain until you reach your opposite end. The stain should not drip off of the wood's edge. Before proceeding to the next step, let the stain dry thoroughly.
Protect the painted surface with a coat polyurethane paint sealant. Apply three coats polyurethane sealer. Allow the third coat to dry overnight before sanding the final coat.